Pin Cushion Sew Along with the Fat Quarter Shop + Video Instructions!

Pin Cushion Sew Along with the Fat Quarter Shop + Video Instructions! {an Art School Dropout's life}I enjoyed the last two Fat Quarter Shop Sew Along’s so much, I agreed to do a few more! I think it’s the idea that everyone is sewing the same thing, but the outcome is sooo different. I love clicking through the list of other bloggers.

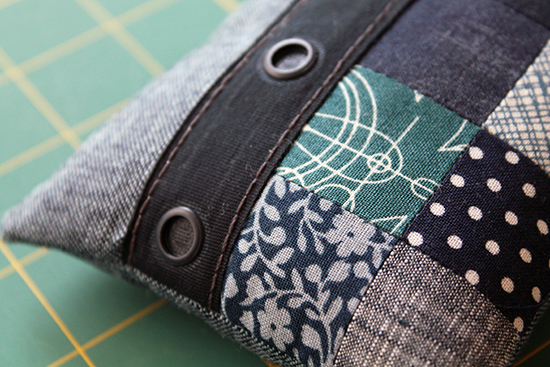
This week’s Sew Along is all about this cute patchwork pincushion with decorative tape accents. There is a video by the Fat Quarter Shop and Sherri of A Quilting Life that show’s exactly how to make it at the bottom of this post.

Pin Cushion Sew Along with the Fat Quarter Shop + Video Instructions! {an Art School Dropout's life}

I mostly stuck to the video instructions when it came to what to cut to what size and all. I even used the fusible fleece as my stabilizer. The two parts I had to change were the type of accent tape used, and the filling. Both weren’t by choice, I just didn’t have the supplies.

Pin Cushion Sew Along with the Fat Quarter Shop + Video Instructions! {an Art School Dropout's life}

When I signed up to do this sew along, I figured I had all the supplies on hand. I always have scraps, I always have filling and I always have twill tape on hand.

Well, I had filling, but it was polyfil, and the pattern calls for ground up walnuts. Once I realized I needed it (I somehow missed that step when I originally watched the video!), I tried to buy it locally with no luck. I didn’t have time to buy it online, so I stuffed mine with polyfil temporarily. I have the ground up walnuts coming in and will be replacing the filling later this week. I like the idea of a heavier pincushion.

The other missing part was the twill tape. I normally have yards on hand! However I forgot that I had made a bunch of drawstring bags recently and I used up my entire stash. I was going to go out and get more, but then thought “well, what if I have something similar on hand?”. After about an hour of searching through my supplies, I came across a spool of vintage snap tape. It’s a twill like tape that has molded plastic snaps built in. I use it on the backs of pillows all the time. I thought the one side looked neat on its own, so I decided to use that in the place of the twill tape. I actually built the entire pincushion around the snap tape!

Pin Cushion Sew Along with the Fat Quarter Shop + Video Instructions! {an Art School Dropout's life} Pin Cushion Sew Along with the Fat Quarter Shop + Video Instructions! {an Art School Dropout's life} Pin Cushion Sew Along with the Fat Quarter Shop + Video Instructions! {an Art School Dropout's life}

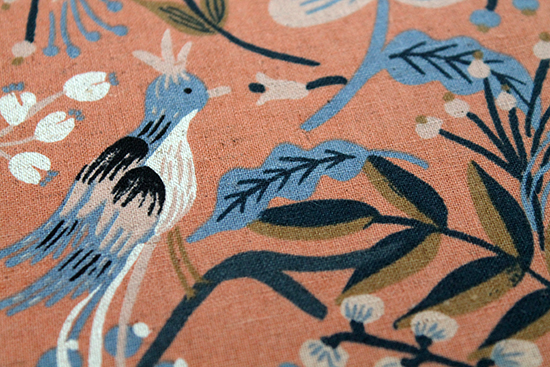
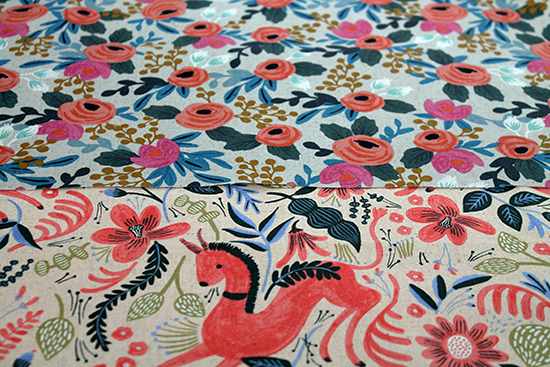
Most of the patchwork pieces are scraps, or fussy cut pieces off fat quarters. The top and backing are Robert Kaufman’s Essex Yard Dyed Linen. It’s a little one the heavier side, so it was perfect for helping the pincushion keep it’s shape.

Pin Cushion Sew Along with the Fat Quarter Shop + Video Instructions! {an Art School Dropout's life}
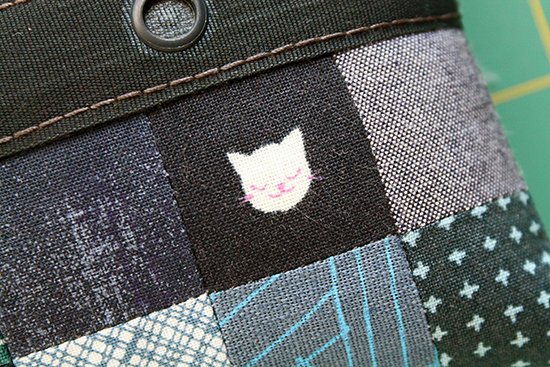
I was very happy to see that the snap tape looked right at home once the entire thing was assembled. I was a little worried it would look silly.

Oh and I used 12wt Spaghetti thread by Wonderfil as a secondary accent on the snap tape. Just that last little detail to pull it all together.

If you would like to make one of these cute little pincushions too, then check out the video below. It includes the supply list, instructions and more…

And if you would like to see what everyone else in the Sew-A-Long made then just click away below. There is some really talented people showcased here.

This post was sponsored by the Fat Quarter shop, and I was compensated for my time.

For any new readers who would like to get updates on any of my new posts you can follow me on InstaGram, add me on Bloglovin or follow Art School Dropout on Facebook (Blog posts show up there an hour after they go live)

Pin It

Spring Quilt Market 2016 – Camp Moda Merit Badges

CampModa_001

I haven’t talked too much about Quilt Market, YET. Mostly because I haven’t finished editing and organizing all the amazing photos.

In the meantime I figured I’d share some of the neat things that came home with me!

Today I wanted to show these adorable iron-on merit badges Moda Fabrics was giving out at each of their designers booths. It was part of their Market theme, which was Camp Moda.

CampModa_002They gave buyers (shop owners) these adorable tote bags that had sash like handles with pre printed spots for all of these patches to go. It made it look like a Girl Scout sash.

I’ve always loved patches, as I talked about here, and now that I am a Girl Scout leader myself, I am OBSESSED with patches. So when I heard they were giving them away at their booths, I went to check it out.

CampModa_003

Most of the designers were handing out the badges themselves, instead of just keeping them in bowls. I liked this because it forced you to chat and get to know each one a little. I get chatty fast, so I REALLY got to know some of them!

That was a brilliant idea Moda had. It made you put a face and personality to each upcoming line. I also found out, from chatting with everyone so much, that most of them chose the designs or sayings themselves. One more cool point there.

CampModa_005 CampModa_004

CampModa_006

These top three were my favorite badges. I may break them away from the pack and use them on a bag or something.

CampModa_007

The rest of them are going on a mini quilt made just for them, and it will hang in my sewing room on this super teeny wall I have. I’ll probably finish it before Spring Market 2019.

Oh and one last really neat thing about these patches is some of them are available to purchase in three packs at your local quilt shop!!! (the link is just to show what the packs look like) I already saw some at Web Fabrics, which is my local shop, front and center when you first walk in. If you NEED a set of your own, just give your local shop a call!!

Pin It

Simple Zipper Bag Sew Along with the Fat Quarter Shop + Video Instructions!

Simple Zipper Bag Sew Along with the Fat Quarter Shop + Video Instructions!! {an Art School Dropout's life}Today I am happy to share with you the Simple Zipper Bag I made using the Fat Quarter Shop’s video tutorial (available to watch at the end of this post)

I was invited to be a part of their sew along and I just couldn’t say no. This bag is perfect for carrying around sewing projects and more. I think my daughter is already eyeing it for her own needs.

Simple Zipper Bag Sew Along with the Fat Quarter Shop + Video Instructions!! {an Art School Dropout's life}The bag uses Annie’s Soft N Stable, which I had never sewn with but am now in love with. It’s awesome! It doesn’t really crease and it keeps it’s form for awhile. Plus I imagine it would protect you in case scissors opened inside the pouch or something similar.

I highly recommend it, and if a pattern calls for it, don’t ignore the suggestion. Ever.

Simple Zipper Bag Sew Along with the Fat Quarter Shop + Video Instructions!! {an Art School Dropout's life} Simple Zipper Bag Sew Along with the Fat Quarter Shop + Video Instructions!! {an Art School Dropout's life} Simple Zipper Bag Sew Along with the Fat Quarter Shop + Video Instructions!! {an Art School Dropout's life} Simple Zipper Bag Sew Along with the Fat Quarter Shop + Video Instructions!! {an Art School Dropout's life}

I used Heather Jones’ upcoming line with Robert Kaufman appropriately named Color Dash (It’s available for pre-order on the Fat Quarter Shop website) for the outside, and then Kona color of the year Highlight for the inside. The binding is one of Robert Kaufman’s chambray, however I can’t remember exactly which one it was.

If you’d like to make one of these super easy bags then check out the video below! It includes the supply list, instructions and more…

And if you would like to see what everyone else in the Sew-A-Long made then just click away below. There is some really talented people showcased here.

This post was sponsored by the Fat Quarter shop, and I was compensated for my time.

For any new readers who would like to get updates on any of my new posts you can follow me on InstaGram, add me on Bloglovin or follow Art School Dropout on Facebook (Blog posts show up there an hour after they go live)

Pin It

Fabric Stash Friday: Les Fleurs by Rifle Paper Co.

Fabric Stash Friday: Les Fleurs by Rifle Paper Co. from their collaboration with Cotton + Steel Fabrics {an Art School Dropout's life}

Last week I spent almost my entire week, and weekend wandering around the International Quilt Market! It’s an industry professional only trade show that is all about sewing. It’s where fabric, thread, batting, pattern, and other companies show off the newest and greatest products.

I go to help find jobs since I am technically freelance, but while I’m there I also do a lot of shopping. The night before the trade show flood opens they have this event called Sample Spree where you can buy bundles of fabric that isn’t out yet, so you can make a sample piece to help promote the fabric when it does come out. This is mainly meant for shop owners, but people like me use it when designing new patterns where there is time in between photographing the pattern and the actual pattern coming out. This way your pattern can be released the same time as the new fabric and it will be super relevant and make people want to replicate it. Does that make sense?

Well this event gets super crazy and there is a lot of running, pushing, shoving and more. It’s really hard to explain the craziness without seeing it in person. I went in with a list and only scored maybe 1/3rd of it.

Luckily for me a friend grabbed this bundle for me…

It’s the brand new line from Rifle Paper Co. named Les Fleurs and is part of a collaboration with Cotton + Steel fabrics.

Fabric Stash Friday: Les Fleurs by Rifle Paper Co. from their collaboration with Cotton + Steel Fabrics {an Art School Dropout's life}It’s a little busier than I would normally go for, but I have a pattern being released soon that would look great in these fabrics.

The bundle I ended up with had numerous substrates in it (different types of fabrics) so I photographed them all separately for the most part, to show them off better.

Fabric Stash Friday: Les Fleurs by Rifle Paper Co. from their collaboration with Cotton + Steel Fabrics {an Art School Dropout's life} Fabric Stash Friday: Les Fleurs by Rifle Paper Co. from their collaboration with Cotton + Steel Fabrics {an Art School Dropout's life}

Fabric Stash Friday: Les Fleurs by Rifle Paper Co. from their collaboration with Cotton + Steel Fabrics {an Art School Dropout's life} Fabric Stash Friday: Les Fleurs by Rifle Paper Co. from their collaboration with Cotton + Steel Fabrics {an Art School Dropout's life} Fabric Stash Friday: Les Fleurs by Rifle Paper Co. from their collaboration with Cotton + Steel Fabrics {an Art School Dropout's life} Fabric Stash Friday: Les Fleurs by Rifle Paper Co. from their collaboration with Cotton + Steel Fabrics {an Art School Dropout's life}

The first substrate is 100% quilting cotton. I’d say half the bundle was quilting cotton actually. As you can see from the photos (which doesn’t do this stuff justice) the colors are super vibrant and rich. It’s like something out of a Wes Anderson movie.

Everything above this sentence is quilting cotton.

Fabric Stash Friday: Les Fleurs by Rifle Paper Co. from their collaboration with Cotton + Steel Fabrics {an Art School Dropout's life} Fabric Stash Friday: Les Fleurs by Rifle Paper Co. from their collaboration with Cotton + Steel Fabrics {an Art School Dropout's life}

Next up is their Lawn fabric, which is slightly thinner than quilting cotton and can be used nicely for quilts and clothing. The blue flower print in the above photo is actually Rayon, I got confused while photographing them!

Fabric Stash Friday: Les Fleurs by Rifle Paper Co. from their collaboration with Cotton + Steel Fabrics {an Art School Dropout's life}

These are the other Rayon prints. The drape of this fabric is beautiful and so flowy. If I was more girly, I’d probably make some dresses out of it.

Fabric Stash Friday: Les Fleurs by Rifle Paper Co. from their collaboration with Cotton + Steel Fabrics {an Art School Dropout's life} Fabric Stash Friday: Les Fleurs by Rifle Paper Co. from their collaboration with Cotton + Steel Fabrics {an Art School Dropout's life} Fabric Stash Friday: Les Fleurs by Rifle Paper Co. from their collaboration with Cotton + Steel Fabrics {an Art School Dropout's life} Fabric Stash Friday: Les Fleurs by Rifle Paper Co. from their collaboration with Cotton + Steel Fabrics {an Art School Dropout's life} Fabric Stash Friday: Les Fleurs by Rifle Paper Co. from their collaboration with Cotton + Steel Fabrics {an Art School Dropout's life} Fabric Stash Friday: Les Fleurs by Rifle Paper Co. from their collaboration with Cotton + Steel Fabrics {an Art School Dropout's life} Fabric Stash Friday: Les Fleurs by Rifle Paper Co. from their collaboration with Cotton + Steel Fabrics {an Art School Dropout's life} Fabric Stash Friday: Les Fleurs by Rifle Paper Co. from their collaboration with Cotton + Steel Fabrics {an Art School Dropout's life}The rest of the bundle of their thick Linen/Cotton Canvas. I’m not 100% how I’m going to use these pieces, but I can say they really are gorgeous! Even though the designs are printed on an unbleached fabric, the colors are still really pretty. There is also a huge panel that is just illustrations of different city maps. I LOVE it.

This fabric isn’t quite out yet, but I bet you’ll start seeing sample pieces popping up everywhere soon enough. I myself have several projects planned out.

All the substrates of Les Fleurs are scheduled to be in shops July 2016! That’s only a month or so away, and a lot of shops already have pre-order listings set up!!

Pin It

Lizzy House’s Whisper Palette Banner for Andover Fabrics

Lizzy House’s Whisper Palette Banner by Jessee Maloney for Andover Fabrics {an Art School Dropout's life}This was probably the hardest quilt to photograph ever. It was so large and so white.

It measures 23″x96″ and was made specifically to show off Lizzy House’s Whisper Palette fabric line in the Andover Fabric’s booth at Quilt Market. It’s odd proportions are to help it fit on the pillars they use in their booth.

Lizzy House’s Whisper Palette Banner by Jessee Maloney for Andover Fabrics {an Art School Dropout's life} Lizzy House’s Whisper Palette Banner by Jessee Maloney for Andover Fabrics {an Art School Dropout's life} Lizzy House’s Whisper Palette Banner by Jessee Maloney for Andover Fabrics {an Art School Dropout's life}

I was unable to get a full shot of the banner at my house, but I hope to get better shots of it at the show or when it comes home.

You can sort of see the quilting I did with my longarm in the shots above. All of the negative space was quilted with my version of feathering, and the circles themselves are free hand straight line stitched. I wanted to divide the two areas and give the piece some texture since it is sooooo white.

This is also the palest quilt I’ve ever worked on. I was so scared I was going to stain it or something worse the entire time. It doesn’t help that I have a messy and curious 6 year old running around.

Even with the fear of stains and the difficulty photographing, this is probably one of my favorite projects to date. Actually it might be my new favorite pattern! I’ve already started on two more versions, and will be releasing the pattern with instructions later next month. I’m excited.

The quilt will be returning to me after the show, but I don’t plan on keeping it. It’s too white for a house with the previously mentioned 6 year old living in it. So I will be cutting it up and assembling them in to four 20″ pillows that I’ll add to the shop. So keep an eye out for those!! (You can call dibs too, just email me)

Pin It