It’s that time again! I am in search of pattern testers for upcoming quilt designs. This time around though I have a proper schedule and will hopefully be releasing a new pattern every 6-8 weeks.
The first group is not needed until mid to late July and the finished quilt or block would not be expected until mid August. Then all other patterns will follow with a similar schedule.
To keep everything organized this time around I will be using a Facebook Private Group to pick and choose who will test what, and then Facebook Secret Groups for each individual pattern.
I will need 8 to 10 testers per pattern, at least 2 each of the following:
beginner
intermediate
advanced
I design my patterns for solid fabrics mostly, but I always love seeing them in print too.
There are many techniques involved in each quilt too. Most will include one to three of the following:
English paper piecing / epp
foundation paper piecing
curved piecing
foundation paper piecing curves
Y seams
large format templates
and more!
If you are interested I have more info and outlined most of my rules in the group, which can be found here.
I made the above pouch as part of CT’s teacher gift this year. I also included an Amazon gift card and a note telling her just how much we loved her! We really did too. She was the best teacher we could possibly hope for as CT’s first.
I really hope next year is just as pleasant. I guess only time will tell.
This thing measures only 2.5″ square and I hand quilted the entire piece. I needed the practice as you can see.
I have a lot more on my plate now, than I did a week ago, so this will be the last Mini Mini Quilt for a little while. Keep checking back though, I have a lot of other stuff up my sleeve these days!
I enjoyed the last two Fat Quarter Shop Sew Along’s so much, I agreed to do a few more! I think it’s the idea that everyone is sewing the same thing, but the outcome is sooo different. I love clicking through the list of other bloggers.
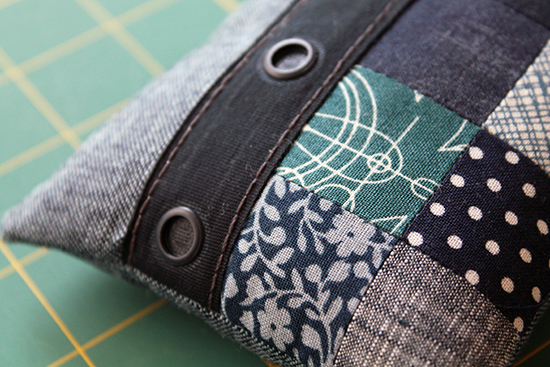
This week’s Sew Along is all about this cute patchwork pincushion with decorative tape accents. There is a video by the Fat Quarter Shop and Sherri of A Quilting Life that show’s exactly how to make it at the bottom of this post.
I mostly stuck to the video instructions when it came to what to cut to what size and all. I even used the fusible fleece as my stabilizer. The two parts I had to change were the type of accent tape used, and the filling. Both weren’t by choice, I just didn’t have the supplies.
When I signed up to do this sew along, I figured I had all the supplies on hand. I always have scraps, I always have filling and I always have twill tape on hand.
Well, I had filling, but it was polyfil, and the pattern calls for ground up walnuts. Once I realized I needed it (I somehow missed that step when I originally watched the video!), I tried to buy it locally with no luck. I didn’t have time to buy it online, so I stuffed mine with polyfil temporarily. I have the ground up walnuts coming in and will be replacing the filling later this week. I like the idea of a heavier pincushion.
The other missing part was the twill tape. I normally have yards on hand! However I forgot that I had made a bunch of drawstring bags recently and I used up my entire stash. I was going to go out and get more, but then thought “well, what if I have something similar on hand?”. After about an hour of searching through my supplies, I came across a spool of vintage snap tape. It’s a twill like tape that has molded plastic snaps built in. I use it on the backs of pillows all the time. I thought the one side looked neat on its own, so I decided to use that in the place of the twill tape. I actually built the entire pincushion around the snap tape!
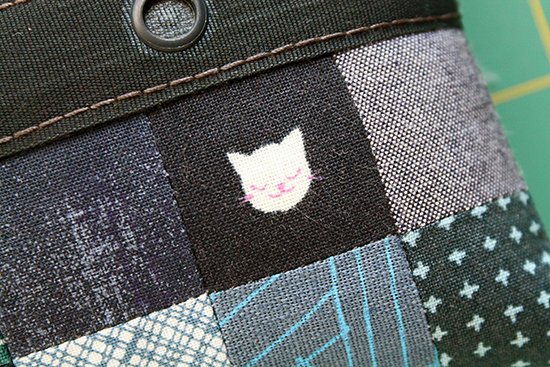
Most of the patchwork pieces are scraps, or fussy cut pieces off fat quarters. The top and backing are Robert Kaufman’s Essex Yard Dyed Linen. It’s a little one the heavier side, so it was perfect for helping the pincushion keep it’s shape.
I was very happy to see that the snap tape looked right at home once the entire thing was assembled. I was a little worried it would look silly.
Oh and I used 12wt Spaghetti thread by Wonderfil as a secondary accent on the snap tape. Just that last little detail to pull it all together.
If you would like to make one of these cute little pincushions too, then check out the video below. It includes the supply list, instructions and more…
And if you would like to see what everyone else in the Sew-A-Long made then just click away below. There is some really talented people showcased here.
Today I am happy to share with you the Simple Zipper Bag I made using the Fat Quarter Shop’s video tutorial (available to watch at the end of this post)
I was invited to be a part of their sew along and I just couldn’t say no. This bag is perfect for carrying around sewing projects and more. I think my daughter is already eyeing it for her own needs.
The bag uses Annie’s Soft N Stable, which I had never sewn with but am now in love with. It’s awesome! It doesn’t really crease and it keeps it’s form for awhile. Plus I imagine it would protect you in case scissors opened inside the pouch or something similar.
I highly recommend it, and if a pattern calls for it, don’t ignore the suggestion. Ever.
If you’d like to make one of these super easy bags then check out the video below! It includes the supply list, instructions and more…
And if you would like to see what everyone else in the Sew-A-Long made then just click away below. There is some really talented people showcased here.
I was unable to get a full shot of the banner at my house, but I hope to get better shots of it at the show or when it comes home.
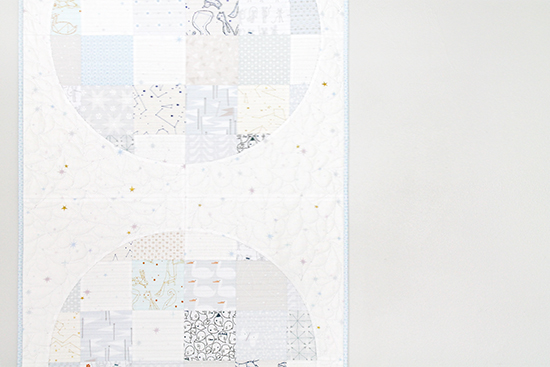
You can sort of see the quilting I did with my longarm in the shots above. All of the negative space was quilted with my version of feathering, and the circles themselves are free hand straight line stitched. I wanted to divide the two areas and give the piece some texture since it is sooooo white.
This is also the palest quilt I’ve ever worked on. I was so scared I was going to stain it or something worse the entire time. It doesn’t help that I have a messy and curious 6 year old running around.
Even with the fear of stains and the difficulty photographing, this is probably one of my favorite projects to date. Actually it might be my new favorite pattern! I’ve already started on two more versions, and will be releasing the pattern with instructions later next month. I’m excited.
The quilt will be returning to me after the show, but I don’t plan on keeping it. It’s too white for a house with the previously mentioned 6 year old living in it. So I will be cutting it up and assembling them in to four 20″ pillows that I’ll add to the shop. So keep an eye out for those!! (You can call dibs too, just email me)


