
Before I get carried away talking about how I made the below project, let me first announce the awesome news…
I am now a quilting contributor on the Sizzix blog!!! How awesome is that? This here is my first official post with them and I’m super excited to start sharing all of my projects on their blog and here on my own.
Ok, enough about all that, let’s talk about these trivets…

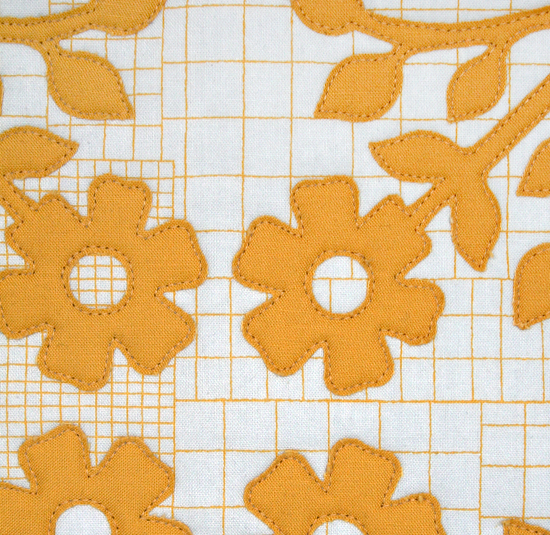
I made the above two trivets as part of the Spring Fling Blog Hop. We were asked to pick out a flower die and make something awesome with it. I chose the Sizzix Bigz Die Flower, Daisy #5 for the simplicity of the design and the options it gave me. I could go super crazy with patterns or very basic with solids.
I seriously struggled with which one to try out first, so I just did both.

The design itself measures 4.75″ square, (which means it’s very charm pack friendly). I knew I wanted to go with this particular layout right away, so to start I cut out a 10″ square from each of my fabrics to use as the background, and set them aside.
I then cut out two 10″ squares of Wonder Under Lite and adhered one to the wrong side of the patterned fabric and one to the solid using a dry iron (don’t turn the steam function on, otherwise you will get ripples). After they cooled down I cut around the interfacing and then cut the 10″ squares into four 5″ squares. This made them the perfect size to lay right on top of the die, with a little wiggle room. Fun Fact: I always wait to cut my fabric after adhering the Wonder Under so I don’t have to worry about centering, shrinkage or accidentally adhering it to my ironing board. It’s less work and stress in the long run.
To get a clean cut, I layered two squares at a time and ran them through my Fabi. The design can be flipped easily, so I didn’t worry about fabric direction or which side of the fabric was facing up. If you have fabric with words, or directional prints, keep track of which piece is going which way.
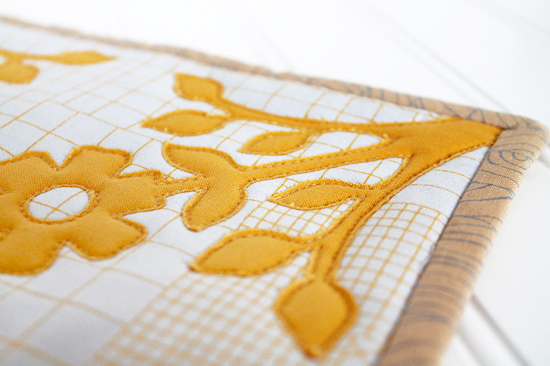 Once all of the pieces were cut, I took the 10″ square backgrounds and the flower pieces over to my ironing board. I placed each flowers corner exactly on the corners of the background pieces and ironed them in place. I made sure the leaves were the same distance from the side and everything was straight all around. Things can shift a little when there are thinner pieces like those stems.
I decided against stitching around the appliques before quilting the entire thing, because I thought it would be neat to use the outline of the flowers as the quilting itself!
 I knew these would actually be used as trivets (unlike most of my projects that hang around looking pretty) so I wanted to make them the right way. I used Insul-Bright Insulated Lining to help protect whatever surface would be under these trivets from heat damage. Then I went the extra mile and added a second layer of cotton batting on top. I sandwiched both of those in between my prepped background piece and my backing fabric and basted them all together.
Like I said above, I wanted the flower design to be my actual quilting design. So I straight stitched around all of the flowers using coordinating thread. These are pretty thick because of the extra batting, so if you attempt this project, make sure to use a walking foot!
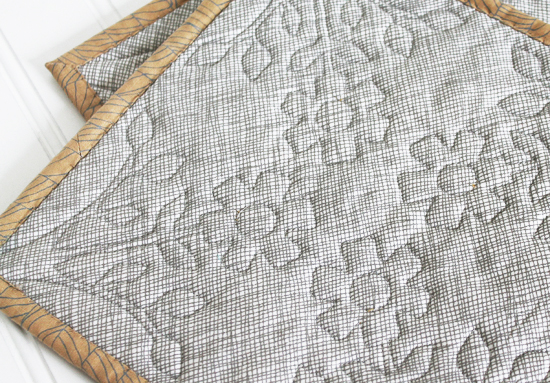
I absolutely love this process, because it leaves the neatest design on the back! Plus its a total time saver because you are combining the applique and the quilting in to one step.
Once I finished quilting both trivets, I attached the binding and hand stitched it to the back. Again, because of how thick these are, I seriously suggest hand sewing the binding on. I feel like you have more control this way.
 Ta-Da! They are finished!
I didn’t realize when picking out my fabrics just how well they match my Pyrex collection. I really wish I had taken some shots of them together. Maybe another time?
Fabrics Used:
- Grid Fabric and Binding – both are from the Doe collection by Carolyn Friedlander for Robert Kaufman
- Solid Fabric – Kona Cotton in Curry by Robert Kaufman
- Background Fabric – leftover bits I had of Widescreen 108″ in Grey by Carolyn Friedlander for Robert Kaufman
I hope you enjoyed my first project with Sizzix! You should also check out all of the other amazing projects made as part of this blog hop:
Monday, April 6th – Jamie Fingal
Tuesday, April 7th – Nicole Daksiewicz
Wednesday, April 8th – Leslie Tucker Jenison
Thursday, April 9th – Cindy Cooksey
Friday, April 10th – Victoria Findlay Wolfe
Saturday, April 11th – Sue Bleiweiss
Monday, April 13th – Karin Jordan
Loved the fresh take on appliqué.